
FullOnDrums.com has launched a new video series called “Session Report”.
In this new series Charlie will document actual sessions at Ultimate Studios, Inc. He’ll talk about choosing microphones to fit the artists sound, micing techniques and concepts, gear, and most importantly why he chooses to use a particular mic or setup.
Session Reports are all about context. Some setups will be fairly straight forward and some may be more unorthodox. The goal is to show what went in to capturing a sound for a specific artist.
The debut Session Report episode features drummer Jeff Bowders (Paul Gilbert/Puddle of Mudd). Jeff performs a track of his album “The Pilgrimage of Thingamuhjig”. Check out the video below and be sure to visit FullOnDrums.com for a complete breakdown of the session including photos, mic list, outboard gear list, and detailed session notes.
Enjoy!

There is a secret to getting great drum sounds that surpasses almost anything else. It’s more important than having good mics, killer drums, or even an amazing room. What I’m about to tell you might shock you…..but it’s a secret that will always set you up for great drum recordings. Are you ready?
The key to getting great drum sounds is….(drumroll….)
HAVING A GREAT DRUMMER. A drummer that can elicit a full and consistent tone from the drums with great time and feel is the #1 secret to having great drum sounds. Jeff Bowders is exactly that. He’s a true powerhouse and a pleasure to work with.
From my conversations with Jeff before the session, I knew he wanted to capture BIG, full sounding drums with smooth and articulate cymbals. I also know from working with him in the past that he is very particular with making sure his tom sounds and kick sounds blend well together. This ensures that his tom/kick combo fills sound even, smooth, and connected. Once I knew what the goal was, I put my plan together.
Kick: Dynamic & Condenser Mics
Why? For Punch and Low End
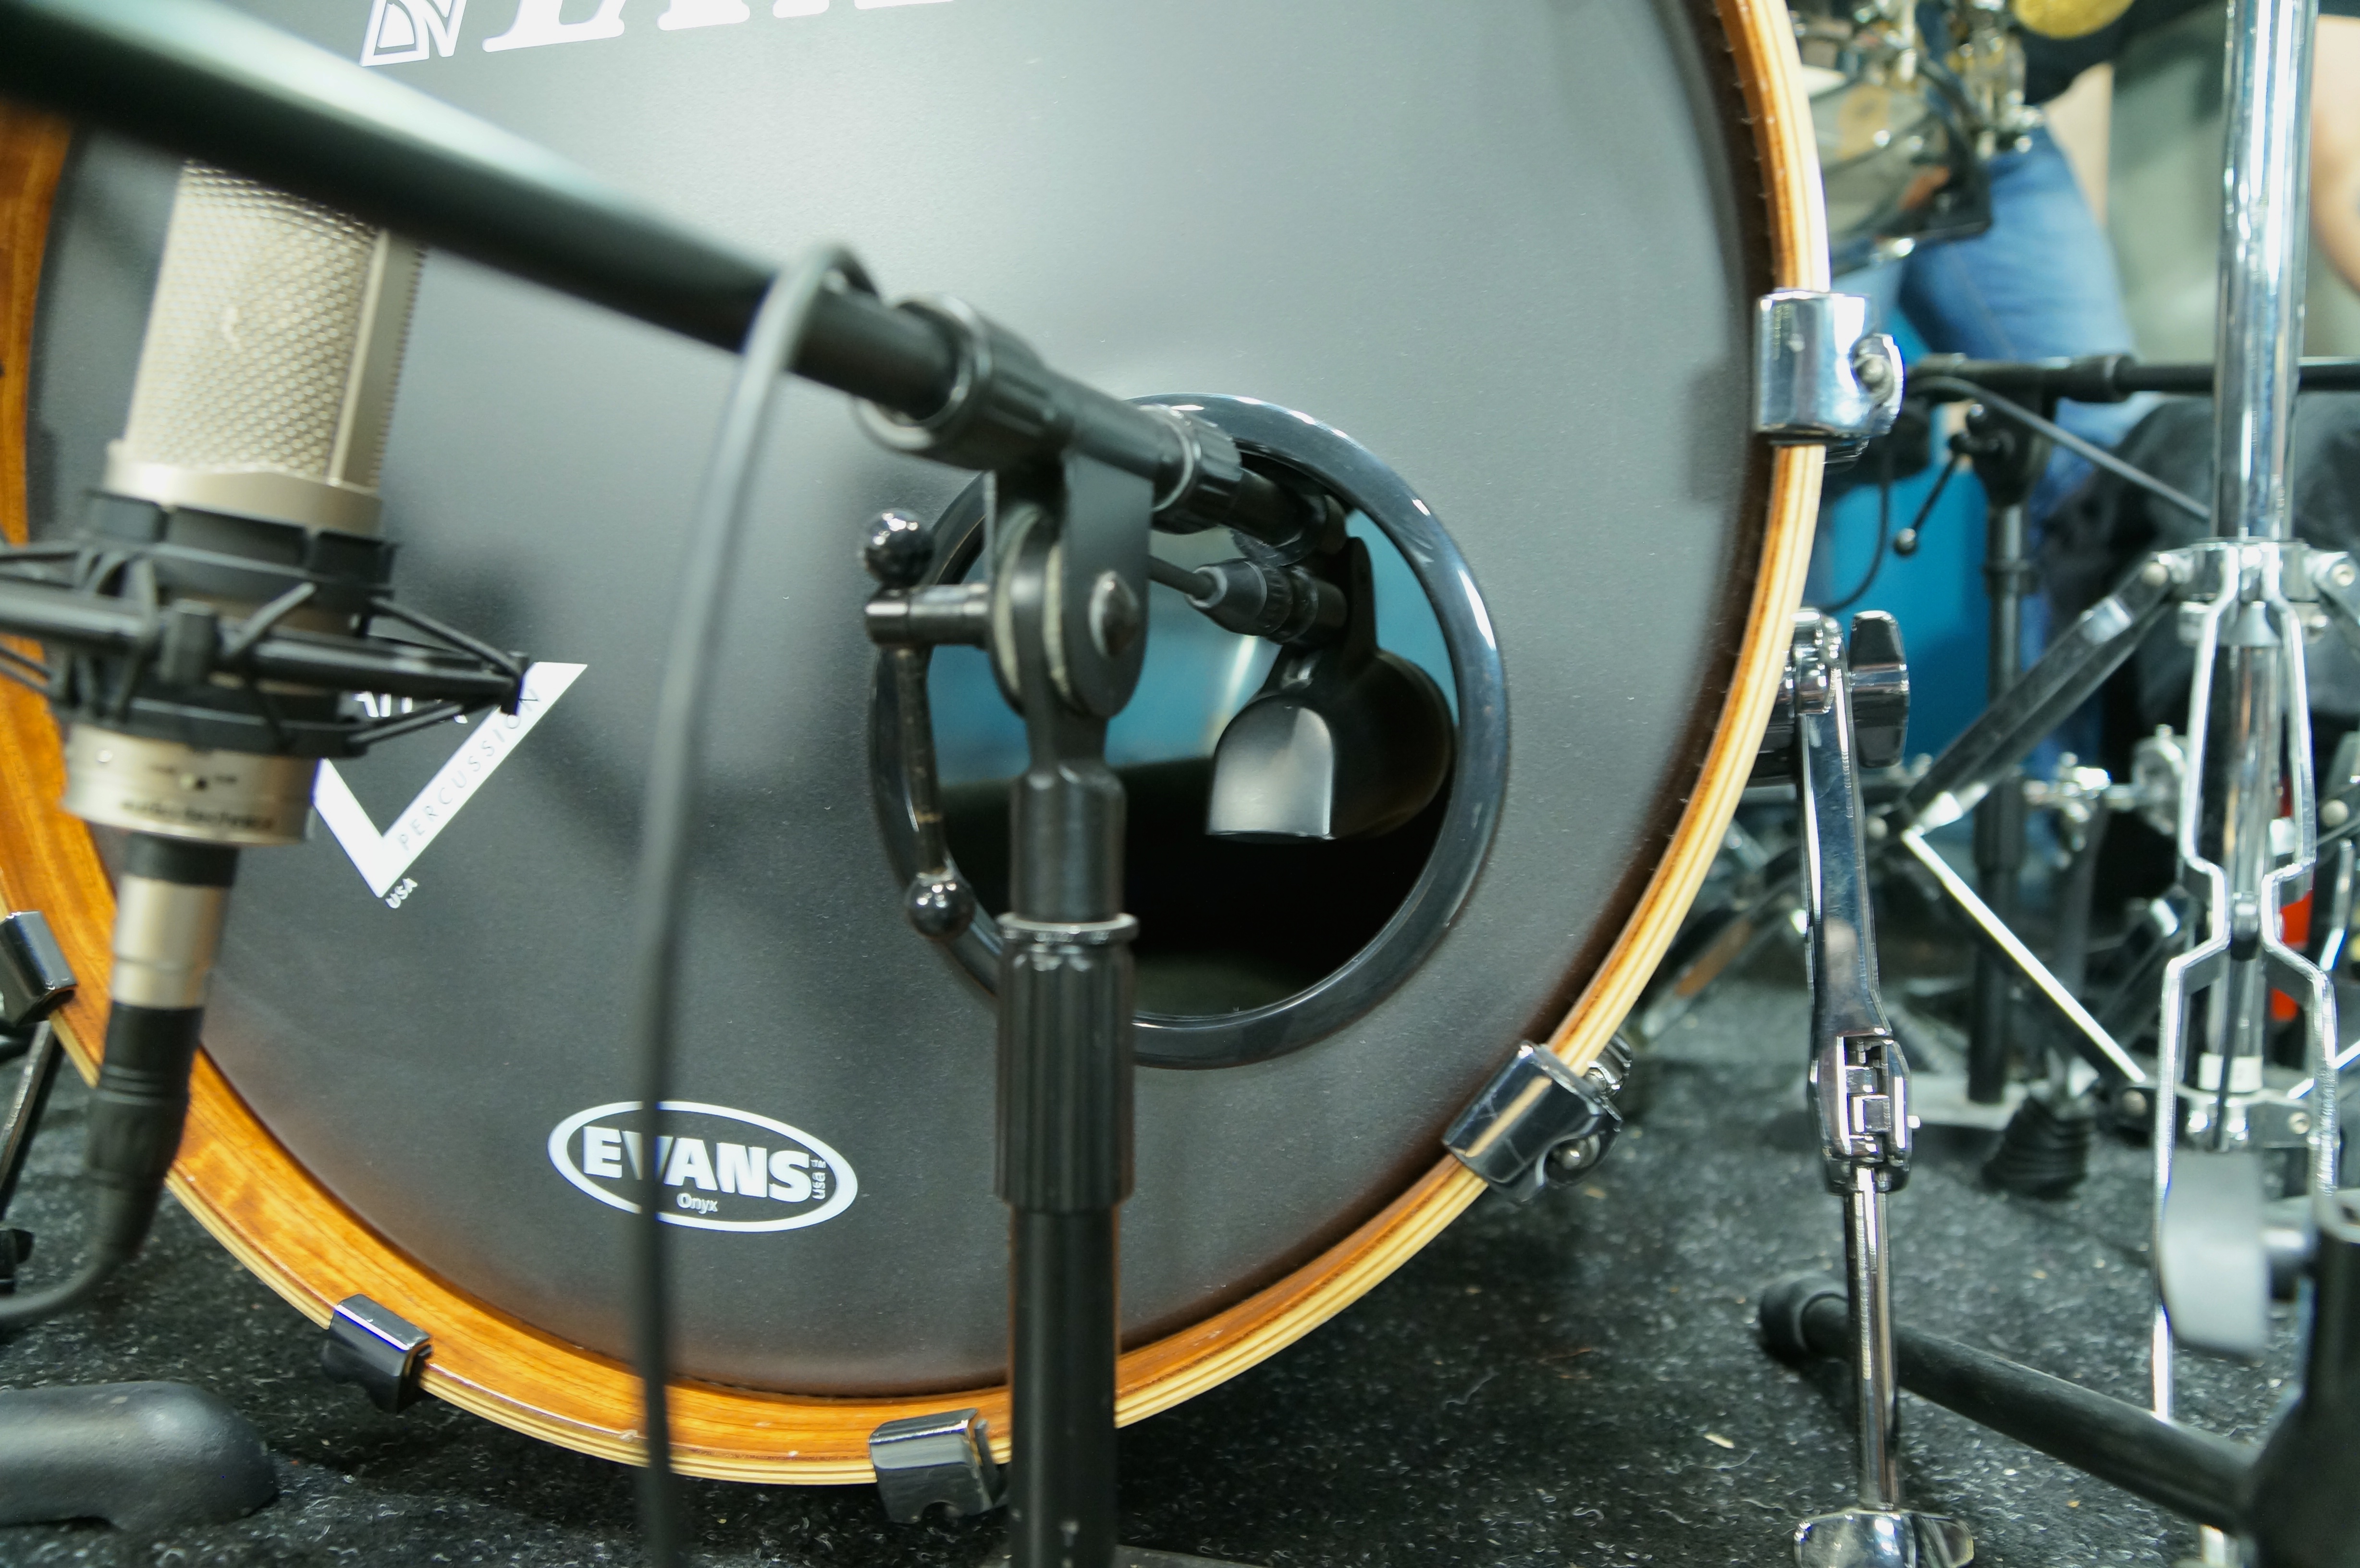
For punch and a tight low end I have an MXL A55 Kicker Dynamic microphone about 3 inches inside the hole of the kick drum. For some body and extended low end I have an AT4047 Large Diaphragm Condenser on the outside of the kick. This mic has a fantastic low end and is fast enough to capture a nice transient on Jeff’s double bass parts.
see the full gallery below
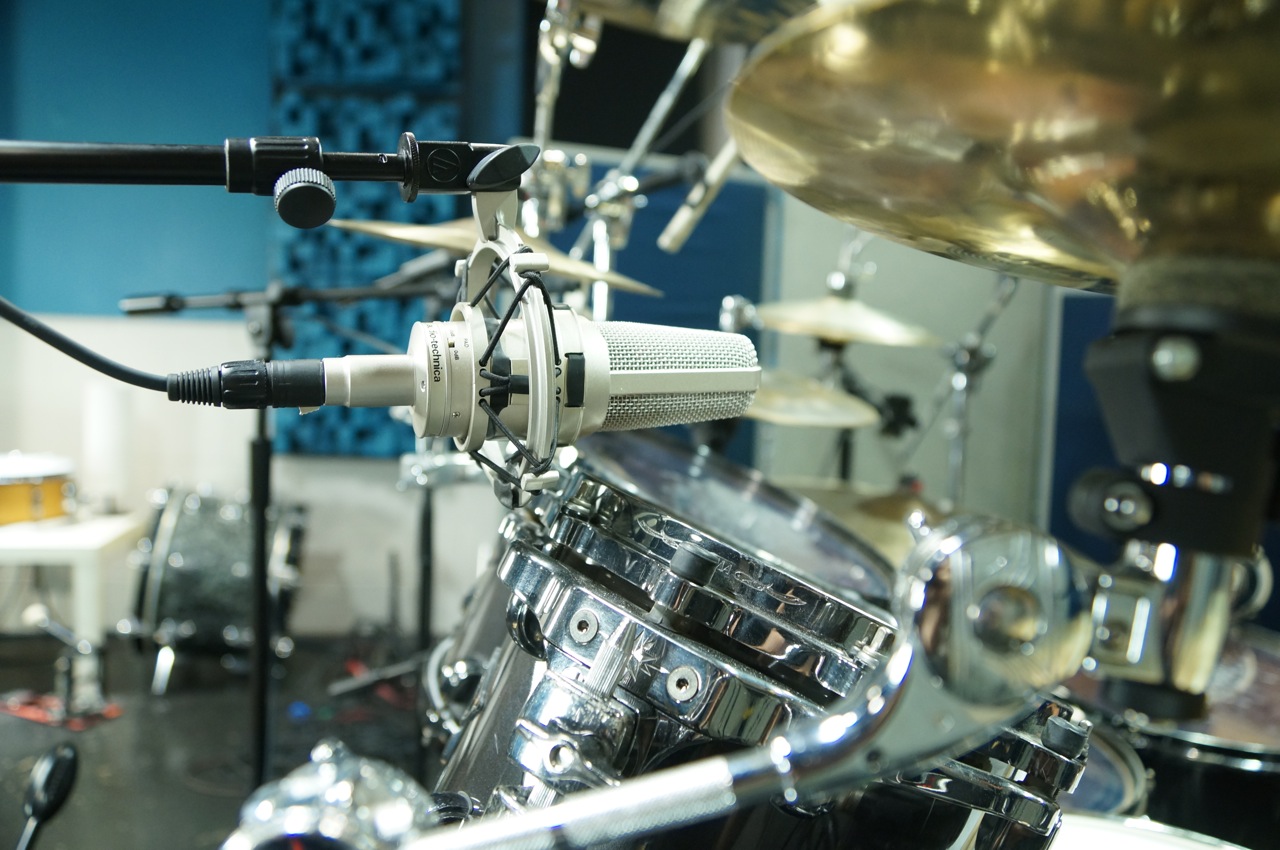
Snare: Dynamic and Ribbon Mics
Why? To Capture Snap and Body

On top of the snare, I have an Audio-Technica Pro63 Dynamic mic to capture snap and some top end. The Pro63 has a nice smooth sound and is more open on the top than most dynamic mics. It’s getting a little compression from the Tonelux TS5C compressor and a touch of 10k from the Trident 88 EQ.
On the side of the snare, I have a Cascade Fathead II Ribbon mic positioned about halfway between the top and bottom rim, facing up and slightly angled towards the snare. While this mic can capture both snap and a lot of body it is a completely different picture of the snare than the top mic. Ribbon mics have a Figure 8 pickup pattern which means they pickup an equal amount of sound from the front and back.
Placed on the side of the snare, they can pick up a very fat, natural snare sound. To get more snap out of this mic, lower it towards the bottom of the snare. To pick up more body, raise it towards the top of the snare. When the top and side mics are added together, you get one heck of a snare sound as well as the ability to tweak your snare sound throughout your mix!
You can also change the angle for a completely different sound. This particular placement captured what I need for this session. However, there are times I will point the ribbon mic directly at the side of the snare. It all depends on what I need to capture to get the sound I’m looking for.
Toms: Condenser Mics
Why? To Capture the Fullest Tone Possible
Even though this song is quite involved and has a lot of tom fills (some quite fast!), Jeff wanted BIG, full sounding toms. We wanted to have a nice low and low-mid, not only to have nice sounding toms, but so the toms and kick would blend well together. To accomplish this I used my trusty AT4047 Large Diaphragm Condensers. They have great transient response and a full low end that is focused and tight. They are perfect for toms and did a great job at picking up Jeff’s faster fills.
Overheads: Ribbon Mics
Why? To Capture Smooth Sounding Cymbals While Adding Depth to the Overall Drum Sound
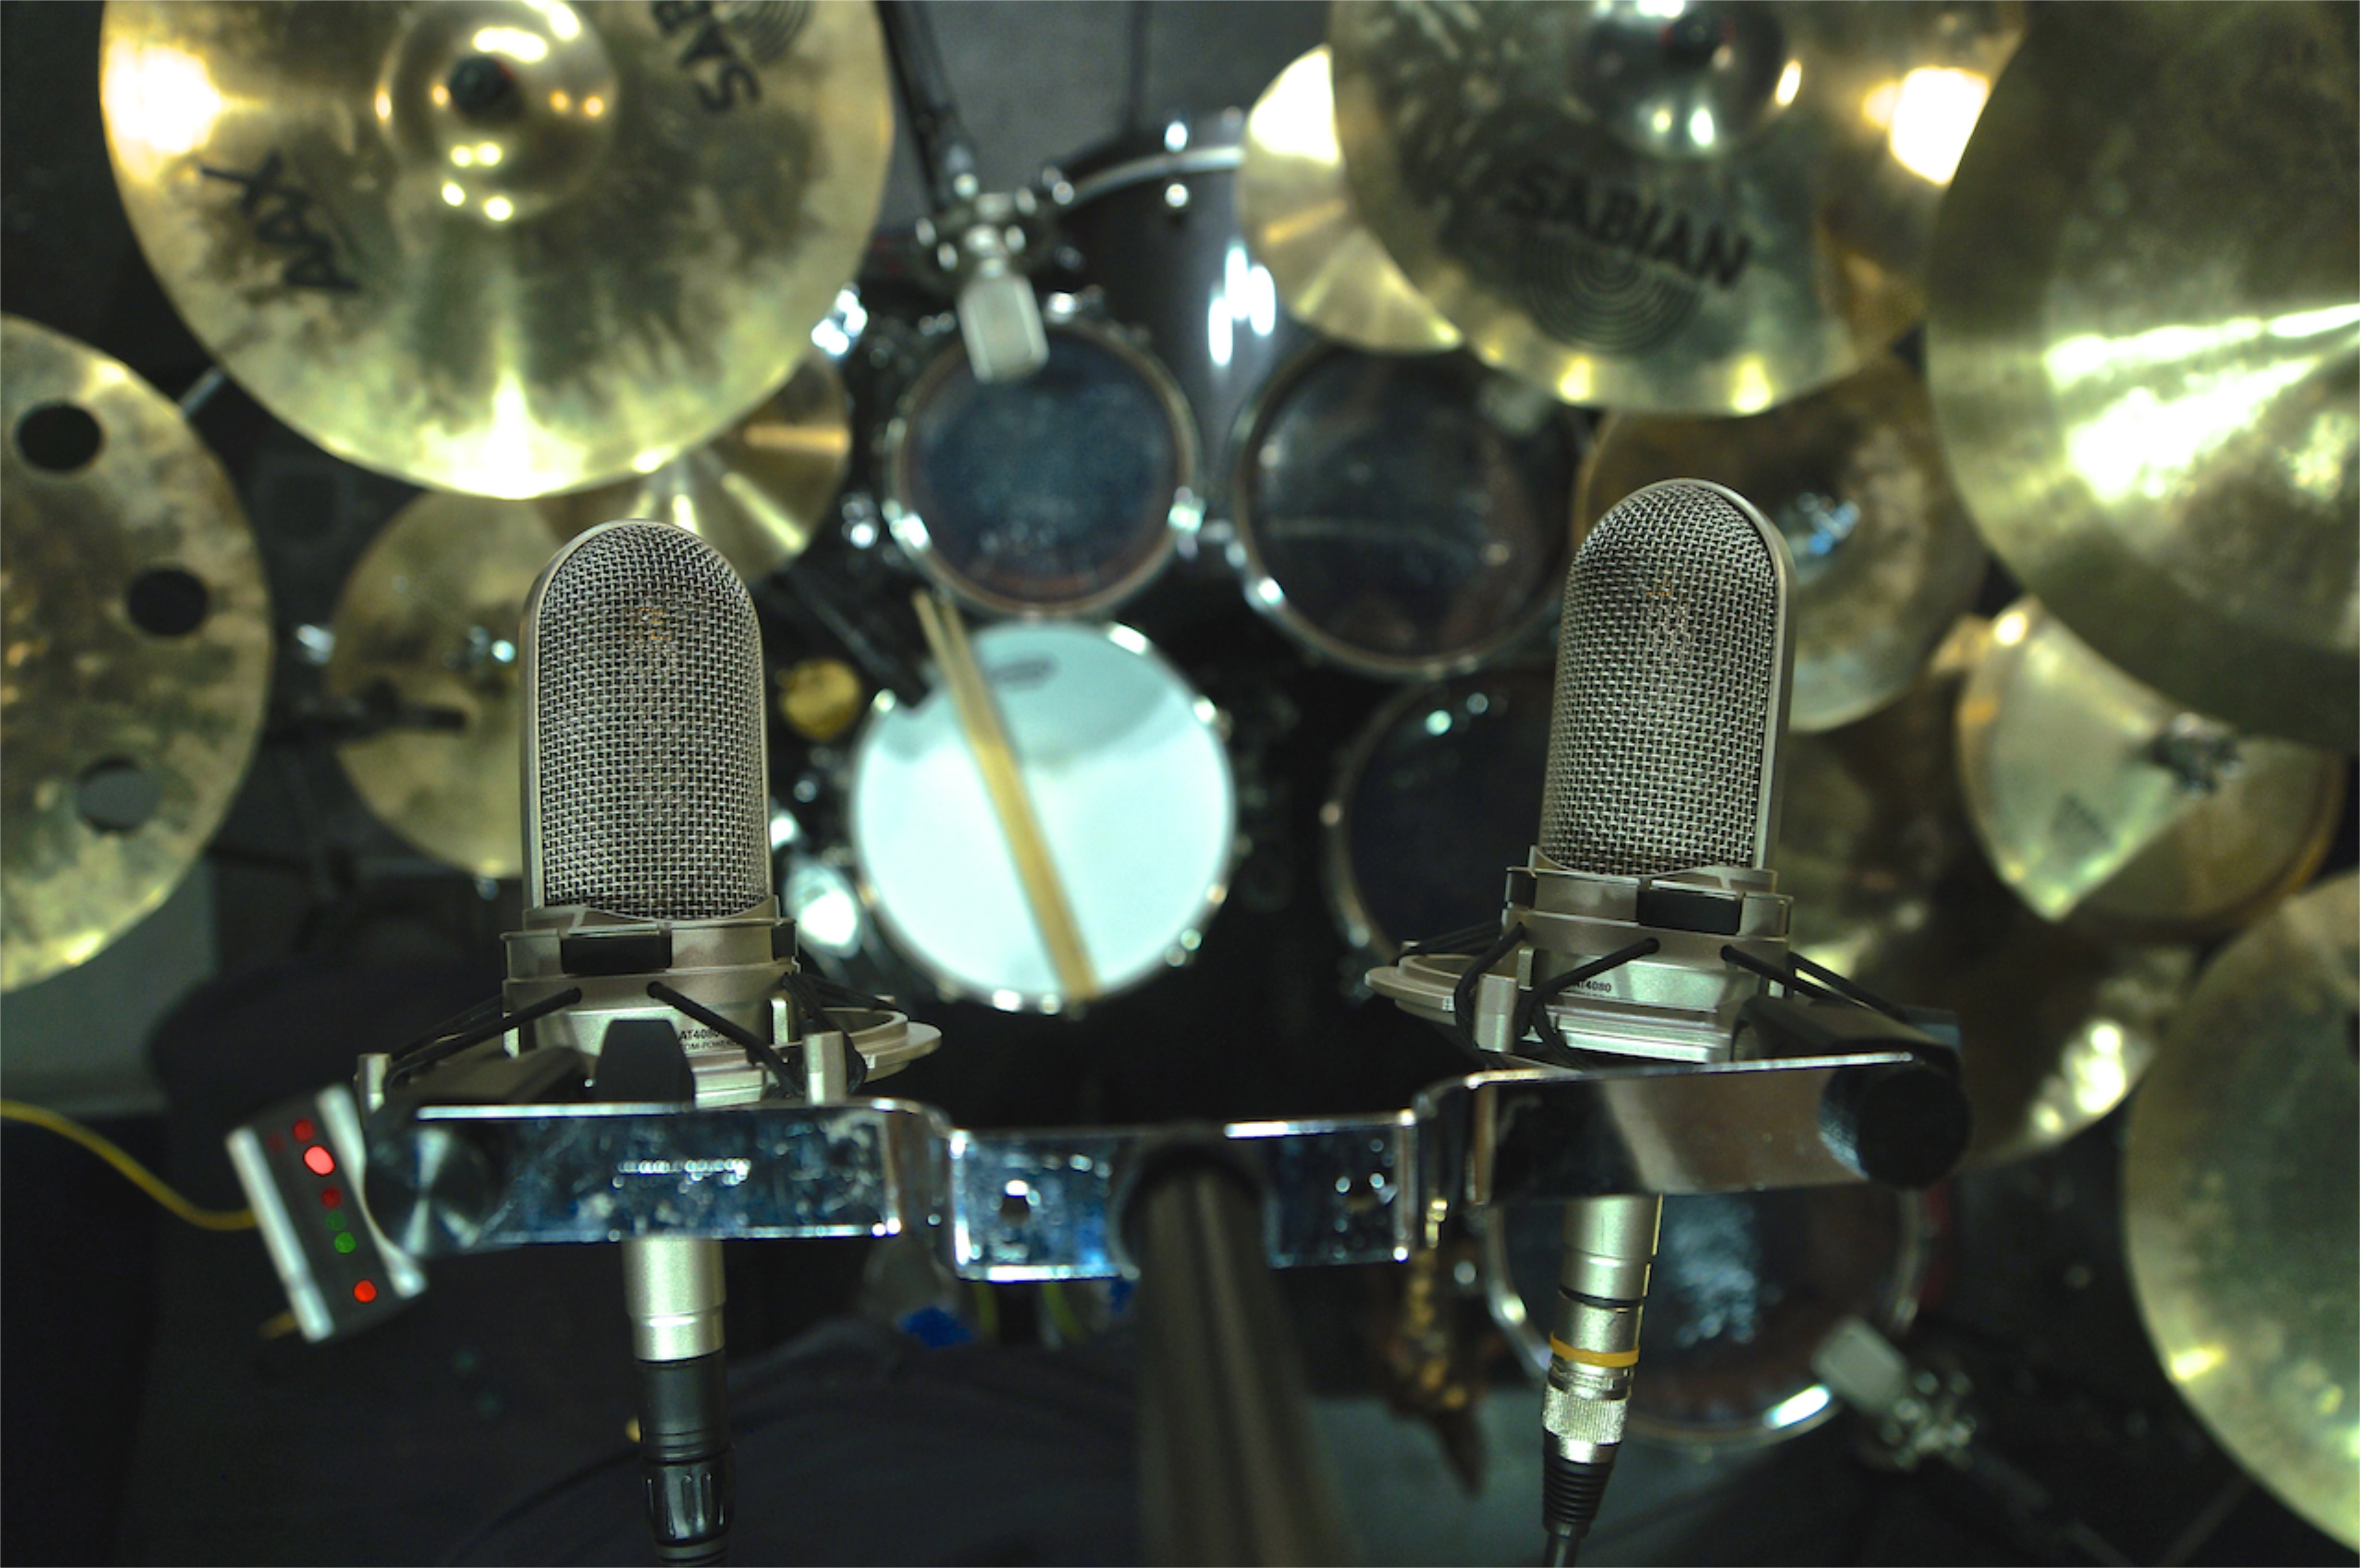
Jeff uses a lot of cymbals, including a china that is raised a little higher than the other cymbals. To work in this style of music, Jeff uses cymbals that are pretty fast and that cut really well. I chose to use Ribbon Mics for overheads for a couple of reasons. First off, we really wanted a smooth cymbal sound without having any one cymbal sticking out more than another. Secondly, I use the overheads for an entire picture of the kit as opposed to just cymbal mics. The AT4080’s allow me to add depth to the snare and toms and capture smooth cymbals. This way I can have the overheads louder in the mix while not sounding like the cymbals are too loud in relation to the rest of the kit. (All in all Ribbon Mics rule and I love the AT4080’s!)
Rooms: Condenser Mics
Why? To Give the Kit a Sense of Space and Fill in Some Air Around the Cymbals That I’m Not Getting from the Ribbon Overhead Mics.

A lot of times I’ll use ribbon mics for my room mics, but since I have them for my overheads, I chose to use all Condenser Mics for my rooms. Besides adding space and dimension to the kit, I’m also adding some air around the cymbals that I’m not getting from the Ribbon Mics. Using different types of mics like this helps to add a sense of depth to the overall sound.
My first set of rooms is a fairly standard stereo pair of AT4050’s in an ORTF configuration. However, I’ve set them to omni (an omnidirectional polar pattern means the mic is picking up sound from 360 degrees around the mic) so it’s not a true ORTF. Since they are set to omni they don’t have a real sense of left/right as much as they just make the room sound BIG. I’m also crushing them through an Overstayer VCA Compressor.
Room #2
My second room mic is a mono AT4047 Condenser mic placed all the way back in the doorway to my ISO booth. It’s about 24’ away from the kit. The doorway is lined with rigid fiberglass, so it’s pretty dry and has a nice low end. Although it’s far away, it sounds tighter than the stereo pair of 4050’s.
Room #3
The last mic I’ll talk about in this article is my experimental mic placement for this session. I’m a FIRM believer that each time you record, you should try at least one new thing. Whether it be a different mic than you usually use or a completely different placement, you HAVE to experiment in order to improve on your drum recording growth (or any recording for that matter). For my experimental mic placement, I put a single AT4050 Condenser mic way up in the ceiling behind an old air conditioning vent. The vent blocked the kit from the mic and I had the mic facing away from the kit towards the back wall. At first it was a little harsh so I put a towel around the vent to dampen some high end. It turned out to be an interesting sound. It literally added “air” around the kit. Not a great sound on it’s own, but pretty interesting in the mix.
To get an idea of how they sound in the mix download and listen to the dry performance (close mics and overheads only) and then listen to the dry performance plus the different room mics.
[Download the Kit Stem and Room Stem Audio Files]
Here’s the full setup for this session:
All mics are going through the Trident 88 console.
1. Kick In: MXL A55 Kicker – Tonelux TS5C Compressor
2. Kick Out: Audio-Technica AT4047
3. Snare Top: Audio-Technica Pro63 – Tonelux TS5C Compressor
4. Snare Side: Cascade Fathead II Ribbon Mic
5. Snare Bottom: SM57
6. Main Hats: Audio-Technica ATM450
7. Rack 1: Audio-Technica AT4047 – Trident 88 eq
8. Rack 2: Audio-Technica AT4047 – Trident 88 eq
9. Floor 1: Audio-Technica AT4047 – Trident 88 eq
10. Floor 2: Audio-Technica AT4047 – Trident 88 eq
11. X-Hat: AKG c451b
12. Ride: Audio-Technica ATM450
13. Overhead LF: Audio-Technica AT4080 – Trident 88 eq
14. Overhead RT: Audio-Technica AT4080 – Trident 88 eq
15. Room LF: Audio-Technica AT4050 – Overstayer VCA Compressor
16. Room RT: Audio-Technica AT4050 – Overstayer VCA Compressor
17. Mono Room: Audio-Technica AT4047 – Golden Age Project Comp54 Compressor
18. Mono Room “Air” Mic: Audio-Technica AT4050 – Golden Age Project Comp54 Compressor
Remember to experiment! Every session is an exploration of sound, so don’t be afraid to try something new.
That’s it for the first installment of the “Session Report”. I hope this has helped you on your journey to recording better drums!
Feel free to contact me if you have any questions.
Happy recording!
Charlie Waymire
www.UltimateStudiosInc.com
Join Ultimate Studios, Inc on your favorite social media sites!
Ultimate Studios, Inc on Facebook
Ultimate Studios, Inc on Instagram
Ultimate Studios, Inc on Twitter